
第一篇blog就记录一下搭建博客的过程
1.环境准备
具体内容可以查看链接。
主要包括:安装git、nodejs、hexo/hexo依赖。
配置github的ssh key。
搭建博客之后链接到仓库。
2.额外的主题使用
使用了开源主题。
- 此时配置文件有:
根目录下"_config.yml"
根目录下"_config.reimu.yml"
主题本身的配置文件themes\reimu\_config.yml"
对于主题之内的改动,不去修改主题自身的yml文件,而是修改外层的"_config.reimu.yml"文件。
3.数学公式相关配置
- 这里的讲解在reimu的README文件里也讲述了一遍。
1.安装 @reimujs/hexo-renderer-markdown-it-plus
1 | npm uninstall hexo-renderer-marked --save |
2.外层 _config.reimu.yml 中将 math.enable 改为 true 可以开启数学公式支持
3.选择基于客户端渲染的方式,在外层 _config.reimu.yml中添加:
1 | math: |
4.在外层 _config.yml 中添加如下配置
1 | markdown_it_plus: |
目前仅支持使用
5.test:
行内公式
块公式
4.图片插入
-
这部分的教程来自链接
-
偏好设置:
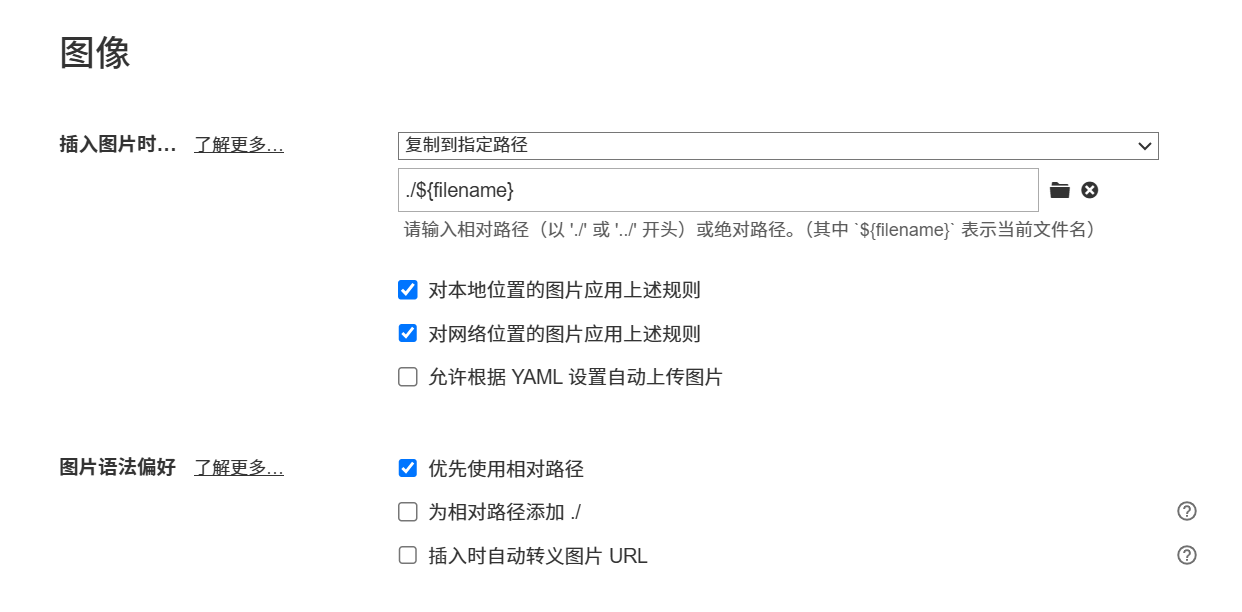
-
路径问题:
复制图片之后的路径名称比如为:blog_setup_tutorial/image-20251022192503621.png
其中blog_setup_tutorial是当前filename。
上传到hexo时,为了保证能够正常渲染,需要将路径改为:/image-20251022192503621.png
需要:ctrl+f。将filename/替换为空。之后上传到hexo就没有对应问题,但是本地渲染图片就有问题了。
可以根据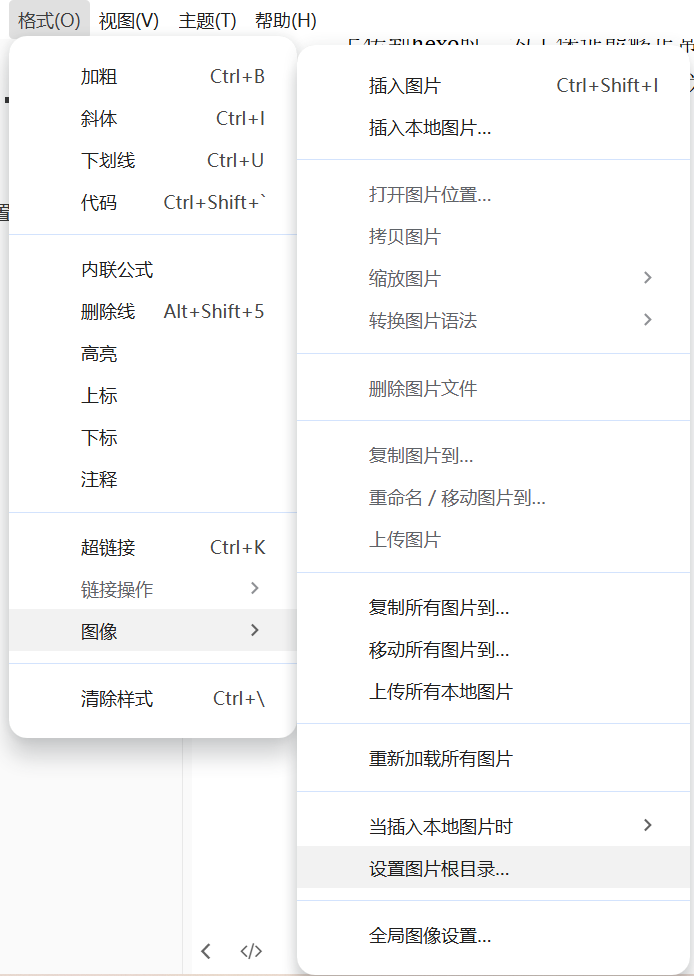
操作来设置图片根目录为
图片所在的目录位置。
5.图标/指针/封面修改
下面的所有有关文件地址如果是以/images开头,实际位置在:~\themes\reimu\source\images
以下所有yaml配置为_config.reimu.yml文件内。
-
favicon:
1
favicon: "/images/ko.ico" #替换为ko图标
-
avator:
1
avatar: "clove2.webp" # which means source/_data/avatar/avatar.webp
-
光标模块:
1
2
3
4
5
6
7#光标模块:
reimu_cursor:
enable: true
cursor:
default: /images/cursor/jf-pointer.png
pointer: /images/cursor/jf-pointer.png # ← 注意:以 / 开头
text: /images/cursor/reimu-cursor-text.png -
封面:
1
banner: "/images/jf1021.webp" #
-
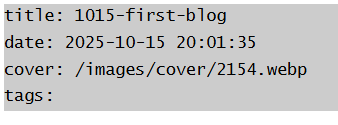
每个blog开始的封面(cover):
- 在想要自己添加cover的blog最前面添加对应字段:(举例)
- 实际路径在
themes\reimu\source\images\cover
- 在想要自己添加cover的blog最前面添加对应字段:(举例)
6.博客运行命令
-
创建新的笔记:
1
hexo new "笔记名称"
-
生成静态网页:(generate)
1
hexo g
-
本地预览:
1
hexo s
之后本地端口4000就可以访问结果,
http://localhost:4000/ -
上传线上:(deploy)
1
hexo d
-
每次修改 站点配置 或 主题配置 后,必须运行:
1
hexo clean && hexo generate
hexo clean:删除public/和缓存(.deploy_git/、db.json等)hexo generate:从零生成全新静态文件
-
上传到github的运行命令可以直接采用:
1
hexo clean && hexo g - d
-
删除博客:
直接在source\_posts里面将对应md文件删除即可。
7.Other
- 20260312补充:
之前reimu主题,基本是整个项目的框架,也在这个基础上进行了很多的修改。为了后续方便git代码的管理,现在将reimu主题有关git的文件删除。